Vertex editing
Reshape features by moving, inserting, and deleting individual coordinates.
Vertex editing gives you direct access to the raw coordinates of a LineString or Polygon feature. You can drag vertices to new positions, insert vertices at any point along an edge, and delete vertices you don't need. All changes update the feature's GeoJSON geometry in real time.
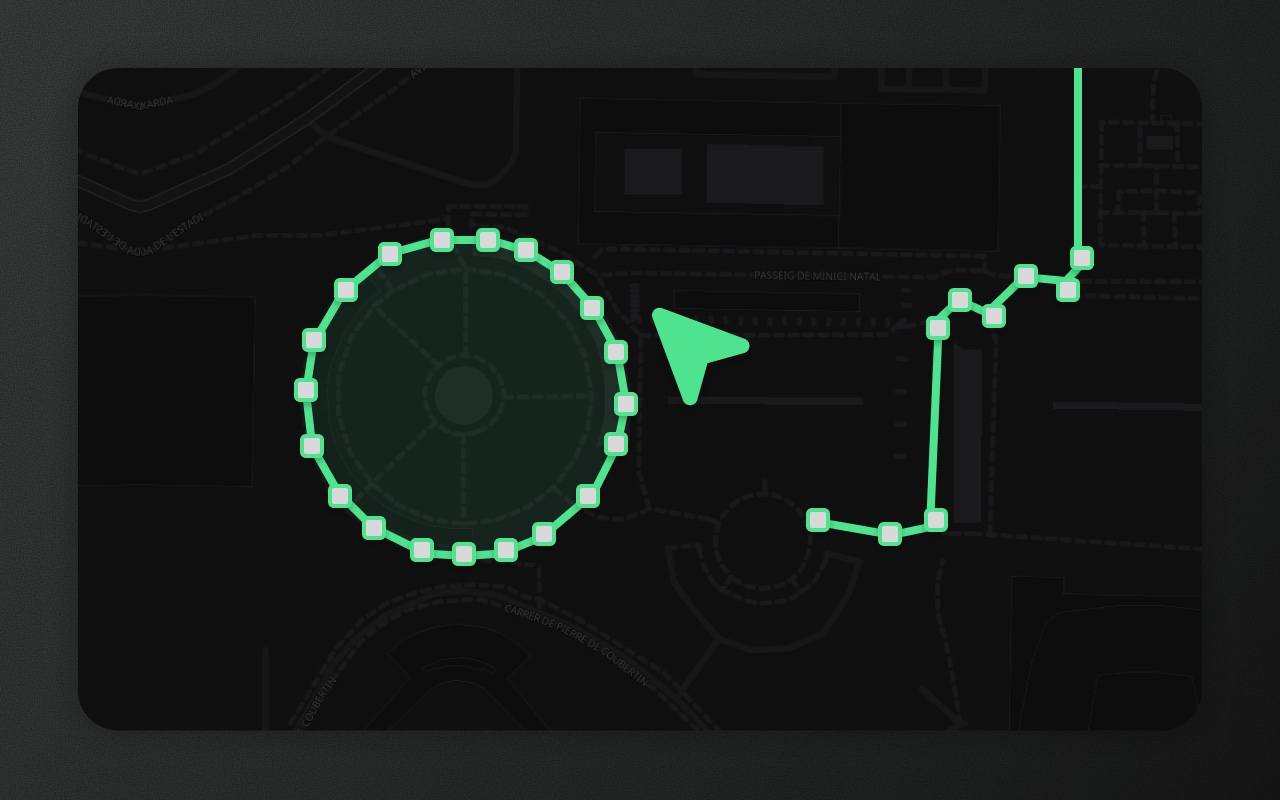
Entering vertex edit mode
Select a LineString or Polygon feature, then use any of:
- Double-click the feature on the map
- Press
Enterwhile the feature is selected
The feature highlights with vertex handles and midpoint handles along all edges. A ring with more than 500 points shows at most 500 handles, picked from the part in view and evenly spaced; zoom in to reach the others.
Warning: Editing the points of a circle (
_drawType: 'circle') or a rectangle (_drawType: 'rectangle') turns it into a plain polygon. Entering vertex edit shows a one-line notice each time ("Editing points will turn this circle into a plain shape.", same for a rectangle); the first committed change (drag, insert, delete, precise coordinates) removes_drawTypein the same update, and one undo brings the circle or rectangle back. Leaving vertex edit without a change keeps it a circle or rectangle.
Warning: Editing the points of a route (
_drawType: 'route') converts it to a plain line, which no longer follows the road network it was snapped to. Entering vertex edit shows a warning each time; the first committed change removes_drawType: 'route'andproperties._waypointsin the same update. Leaving without a change keeps the route.
Handles
Element Editor renders two types of handles in vertex edit mode:
| Handle | Appearance | Action |
|---|---|---|
| Vertex handle | Small square with a coloured border (filled when selected) | Click to select; Shift+click to add or remove from the selection; drag to move; right-click for Edit coordinates… and Delete point |
| Midpoint handle | Small diamond at the midpoint of the hovered edge | Click to insert a new vertex at that position; drag to insert and place it |
A single click on a vertex never deletes it. Clicking a vertex keeps you in vertex edit mode and doesn't select another feature.
Moving a vertex
Drag any vertex handle to reposition it. If snapping is enabled, the vertex snaps to nearby vertices and edges on other features as you drag. The surrounding edges update live as you move.
Selecting vertices
- Click a vertex to select only that vertex (any previous vertex selection is replaced).
Shift+clicka vertex to add it to the selection, or remove it if it's already selected.- Dragging a vertex moves it; it doesn't change the selection.
Selected vertices fill in solid. The floating action bar at the bottom of the map shows how many points are selected.
Bulk selection with Shift+drag
Hold Shift and drag a rubber-band rectangle anywhere over the feature to select every vertex inside the box at once — selected vertices light up live as the box passes over them, and unhighlight as it leaves. Repeat with another Shift+drag to add more vertices to the existing selection — selections are additive across drags. Selected vertices fill in solid; unselected ones stay hollow.
With multiple vertices selected, the floating action bar at the bottom of the map exposes bulk actions:
- Simplify — collapses redundant vertices among the selection (Ramer-Douglas-Peucker on the selected sub-path)
- Delete — removes every selected vertex in one undo step
Shift+drag works while the same vertex-edit feature is active; it does not switch to a different feature.
Topological editing
When two features share a vertex (e.g. two adjacent polygons with a common boundary), Element can move the shared coordinate on every feature at once. Drag the shared vertex on one polygon and any neighbour that has a vertex at the same coordinate moves with it — the boundary stays continuous.
Toggling:
- Open the Settings panel (gear icon in the bottom toolbar)
- Toggle Topological editing (on by default)
Temporarily disable with Cmd/Ctrl: While topological editing is on, hold Cmd (macOS) or Ctrl (Windows/Linux) during a vertex drag to "tear" the dragged vertex free of its neighbours — only the dragged feature updates; others stay put. Release the modifier mid-drag to re-engage neighbour movement.
This mirrors the Snapping modifier-disable pattern: the same modifier means "ignore the auto-link this once."
Inserting a vertex
Hover an edge to reveal its midpoint handle (the hollow diamond between two vertex handles). Click the midpoint to insert a new vertex at that position; the midpoint disappears and two new midpoints appear on either side. Dragging a midpoint handle directly also inserts a vertex and positions it in one gesture.
Midpoints are only shown for the edge under the cursor — moving away hides them. This keeps the polygon visually clean during editing while still surfacing the insertion handle the moment you need it. The hover band has a small hysteresis so the handle stays visible as you nudge toward it.
Edge-drag also works: press anywhere along an edge (not just the midpoint; within about 15 px of it, where the edge snap diamond shows) and drag. A new vertex is inserted on that edge and follows the cursor until release, as one undo step. Dragging inside the shape away from its edges pans the map.
Deleting a vertex
- Right-click a vertex and choose Delete point. If the vertex you right-click is part of a selection of several vertices, the item reads Delete N points and removes the whole selection.
- Or select one or more vertices (click /
Shift+click/Shift+drag) and pressDeleteorBackspace, or use Delete in the floating action bar.
Each delete is one undo step. With topological editing on, deleting a vertex shared with a neighbouring polygon removes it from the neighbour too.
Element enforces minimum vertex counts:
| Geometry type | Minimum vertices |
|---|---|
LineString | 2 |
Polygon outer ring | 3 |
A delete that would go below the minimum is blocked with an error message ("Cannot delete: an area needs at least 3 points" / "a line needs at least 2 points"), and the geometry is left unchanged. To remove the feature entirely, exit vertex edit mode and delete the feature.
Precise coordinate input
Right-click any vertex handle and choose Edit coordinates… to open a small "Precise coordinates" popup with the exact latitude and longitude for that vertex. Type new values and press Enter or Save (Escape or Cancel closes it without changes). This is useful for placing vertices at known coordinates without relying on cursor precision.
Rectangles
A rectangle (_drawType: 'rectangle') edits like any polygon: dragging a corner moves only that corner, and you can insert points on its edges or delete corners. The first committed change makes it a plain polygon (see the warning at the top of this page); one undo restores the rectangle. To resize or rotate a rectangle and keep it a rectangle, use the transform box (A) instead.
Exiting vertex edit mode
- Press
Escapeto exit and return to the selection mode - Press
Enteragain to toggle out of vertex edit mode - Click outside the feature on empty map space
Changes are committed continuously as you edit — there is no separate confirm step. Undo (Cmd/Ctrl+Z) works on individual vertex operations.